If you enjoy blasting your favorite tunes with powerful subwoofers in your car, you’ve probably experienced the annoyance of trunk rattles.
I know how annoying it gets when you hear the trunk rattle while listening to your favorite tunes. You might have looked into the issue and adjusted a few stuff in the trunk still, the problem persists.
According to the European Environment Agency, long-term noise exposure can cause a variety of health effects including annoyance, sleep disturbance, and negative effects on the cardiovascular and metabolic systems.
The sound and vibrations can distract you from the overall enjoyment of your audio experience. If you’re looking for solutions to stop trunk rattle from subs you’ve come to the right place.
Whether it’s adjusting audio settings, tightening mounts, installing sound-deadening mats, or even replacing blown speakers and subs, we’ve got you covered with practical solutions.
In this article, I will walk you through the causes of trunk rattle from subs and various methods to eliminate the issue.
Key Takeaways
- Trunk rattle from subs is a common issue for car audio enthusiasts.
- Causes of trunk rattle include vibration of car body panels and unbalanced audio settings.
- Adjusting audio settings, tightening mounts, and installing sound-deadening mats can help eliminate trunk rattle.
- Replacing blown speakers and subs may be necessary if the issue persists.
- By addressing the causes and implementing the appropriate solutions, you can enjoy a crisp, clear sound in your car.
Common Causes of Trunk Rattle from Subs

Understanding the causes of trunk rattles from subwoofers will help you understand and deal with the issue.
The rattling in your trunk is often caused by the vibration of car body panels when the subwoofers produce sound waves at a certain volume.
This vibration occurs when the surfaces and loose items in the car are resonating with the sound waves. It’s important to understand the causes of car door rattling to address the issue effectively.
When subwoofers produce sound waves, they create oscillations in the air that travel as pressure variations.
These pressure variations, also known as sound waves, can cause the surrounding objects to vibrate. In the case of car doors and trunk panels, the vibration occurs due to their interaction with the sound waves produced by the subwoofers.
When the sound waves reach the car body panels, they cause the panels to vibrate at their resonant frequency. This resonance amplifies the vibrations, leading to the audible rattling sound in the trunk.
Additionally, loose items inside the trunk can contribute to the rattling noise. These items, such as tools, spare tires, or loose panels, can resonate with the sound waves and create additional vibrations and rattling.
How To Stop Car Door Rattle From Subwoofers
To effectively address the trunk rattle caused by subwoofers it is important to minimize the effects of sound waves on the body panels this can be achieved by implementing various solutions like adjusting audio settings, tightening mounts, and installing sound demeaning mats in the trunk.
By following all these steps you can make your trunk rattle free from subwoofers and peacefully listen to your favorite music.
Adjustment of Audio Systems and Settings
Sometimes, car door rattling can be resolved by making adjustments to your audio system and settings. Unbalanced audio settings can affect the operation of your speakers and subs, leading to rattling.
Additionally, dirt, grit, and dust can cause the speakers and subs to misbehave. By cleaning them and properly adjusting the audio settings, you may be able to eliminate trunk rattles caused by subs.
When adjusting your audio system, start by examining the equalizer settings. An improper balance between the bass, midrange, and treble can result in distorted sound and potential vibrations. Consider using a music track that has a steady bass line and adjust the settings until you achieve a clear, balanced audio output.
Furthermore, remember to check the fade and balance settings of your car’s audio system. Improper fade and balance adjustments can cause one speaker or subwoofer to work harder than the others, leading to rattling and distorted sound. Ensure that the sound is evenly distributed across all speakers and subs for optimal performance.
Another essential aspect to consider is the cleanliness of your speakers and subs. Dirt, dust, and debris can accumulate on the diaphragms, causing them to vibrate irregularly and produce unwanted rattling sounds.
Gently clean the surfaces of your speakers and subs using a soft cloth or brush to remove any dirt or dust particles.
The Effects of Dirt and Dust on Speakers and Subs
The accumulation of dirt and dust on speakers and subs can have a detrimental impact on their performance. These particles can restrict the movement of the diaphragm, preventing it from effectively producing sound waves.
Additionally, dirt and dust can increase friction within the speaker components, resulting in compromised audio quality and potential rattling.
Regular cleaning and maintenance of your speakers and subs can significantly improve their longevity and performance.

By adjusting the audio settings of your car’s system and ensuring the cleanliness of your speakers and subs, you can minimize trunk rattle caused by subs.
However, if the rattling persists, it may indicate a more significant issue that requires professional assistance or further troubleshooting.
Adjustment of the Mounting of Subs and Speakers
When it comes to stopping trunk rattles from subs, adjusting the mounting of your subs and speakers can make a significant difference. Start by checking for any loose panels and screws in your car’s interior.
These loose components can contribute to the rattling noise created by subwoofers. Tighten them accordingly to ensure a secure fit and eliminate potential sources of vibration.
In addition to addressing loose panels and screws, it’s important to pay attention to the contact between the mounted speakers and the car door. Uneven contact can result in annoying rattling sounds.
To overcome this issue, you can use plastic foam inserts. These inserts help create even pressure distribution and reduce vibration, minimizing trunk rattle caused by subs.
Place the foam inserts strategically to create a snug fit between the speakers and the car door, ensuring a more stable and rattle-free audio experience.

Installation of Sound Deadening Mats
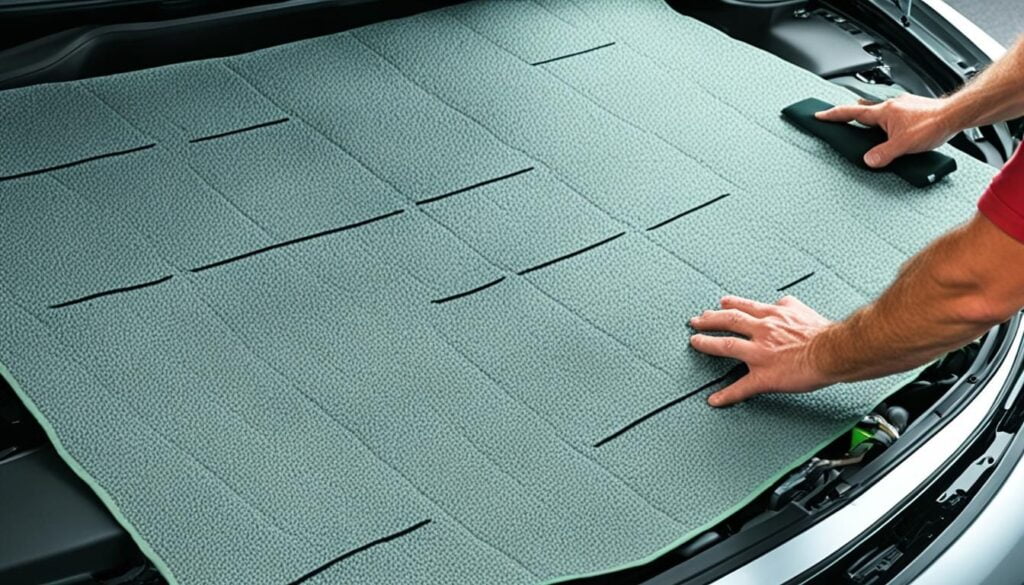
If the previous methods don’t provide effective results installing sound-deadening mats can be an effective solution to stop ratte from subwoofers. These mats are specifically designed to reduce sound waves and absorb vibration helping in minimizing the trunk rattle caused by subwoofers.
If don’t want to burden your pocket with dynamat then there are other alternatives of dynamat which I have covered altogether in a different article.
One popular and highly effective option is the Dynamat Xtreme car door kit these mats are known for their superior sound-deadening properties and are widely utilized in the automotive industry.
It is designed to provide superior noise reduction ensuring a quieter and more enjoyable audio experience in your car. Proper installation of sound-deadening material is crucial in achieving optimal results.
It’s important to clean the surface thoroughly before installing the mats to ensure a secure and long-lasting bond. By following the instructions given below you can install the sound-deadening mats to stop trunk rattles from subwoofers.
Key Benefits of Sound Deadening Mats:
- Reduces vibrations and rattling caused by subwoofers
- Minimizes road noise for a quieter and more comfortable driving experience
- Improves audio quality by eliminating unwanted resonances and echoes
- Enhances bass response and overall sound clarity
- Provides thermal insulation, reducing heat transfer from the engine and exhaust
How To Apply Dynamat Sound Deadening Mat
- You need to take out the things which are attached to the floor of the car.
- Get some cloth and rubbing alcohol to clean the car floor thoroughly.
- Measure the car floor and mark the sizes on the sound-deadening mat.
- Get a utility knife cut the sheet and trim it to the size of the car floor.
- Now peel off the sheet and place the mat on the floor ( if you don’t have an adhesive mat then put the adhesive and place the sheet on the floor)
- Use a roller for perfect fitting of the sound-deadening mat and to take out the air bubbles.
- Do the final touch-ups and put back everything in its place.
Congratulations you have successfully applied the dynamic sound-deadening mats in your car.

Replacement of Blown Speakers and Subs
In some cases, trunk rattle may be caused by blown speakers or subs. To troubleshoot this issue, we recommend playing a soft song at a moderate volume and listening for any unusual noises.
If you hear a fuzzy or popping sound or notice a tear in the audio cone, it’s likely that the speaker or sub is damaged and needs to be replaced.
When it comes to troubleshooting blown speakers and subs, it’s important to carefully inspect the components for signs of damage.
Signs of Blown Speakers:
- Fuzzy or popping noise during audio playback
- Limited or no sound output
- Distorted sound quality
- Tear or hole in the audio cone
Signs of Blown Subs:
- Hollow rattle sounds during bass-heavy music
- Reduced bass output
- Loss of deep, low-frequency audio
- Tear or hole in the subwoofer cone
If you encounter any of these signs, it’s recommended to replace the damaged component with a new one. This will not only help eliminate trunk rattles but also restore the audio quality of your car’s sound system.

Final Thoughts On Stop Trunk Rattle From Subwoofers
Implementing all the solutions provided will eliminate the truck rattle from the subwoofer in the car enjoy audio in the car and restore a crisp and clear sound in the car.
primarily you need to address the causes of the rattling and implement the appropriate steps so you can enjoy music without distraction and unwanted noise
The solutions provided above will stop the trunk rattling and improve the audio quality. Ensuring that your system is properly adjusted can make a significant difference.
Additionally taking time to clean your speakers and subs from dirt, grit, and dust can prevent from causing unwanted rattling.
Tightening the mounting of your subs and speakers can also help eliminate trunk rattles. Checking for loose panels and screws and using plastic foam inserts to ensure even contact between the mounted speakers and the car door can make a noticeable difference.
If these steps are not enough, installing sound-deadening mats, such as the popular Dynamat Xtreme Car Door Kit, can further reduce the effects of sound waves on surfaces.
If you suspect that blown speakers or subs are causing the trunk rattle, troubleshooting by listening for unusual noises and inspecting for any damage, such as a tear or hollow rattle, is crucial. In such cases, it may be necessary to replace the damaged component to fully resolve the issue.
Related Articles:
